Single Sign-on
Single sign-on is supported in every product that Pagedip offers. In fact we strongly encourage that all dedicated deployments have a single sign-on integration. With SSO, you skip using a password when logging into Pagedip services by using some pre-existing, 3rd-party account. This cuts down on management, streamlines access, and keeps things secure.
Single sign-on is very dynamic and can be used for a myriad of authentication purposes. We have successfully used single sign-on in solutions such as:
Allowing employees of an organization to edit and publish content.
Giving sub-contractors access to proprietary published material.
Authenticating readers who purchased access to the content through a third-party system.
Major Platforms
Below are the guides for single sign-on for major identity platforms.
General Integration
We support the two most used integrations, OpenID Connect and SAML 2.0. These specifications are secure and ubiquitous making them great SSO solutions. In the event that your company does not use an identity system or your system does not support these integrations, please let us know and we can find an appropriate solution.
If you are looking to add SSO to you Pagedip Editor, please send the details to us as we will need to directly configure your Editor instance. Setting SSO for readers and publishers however, is very straight forward.
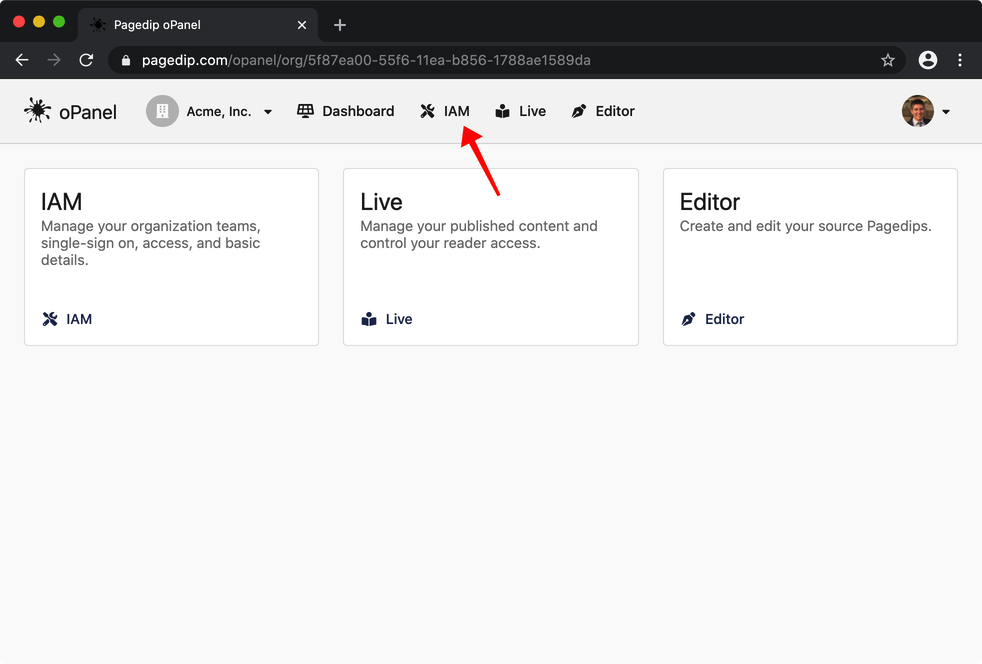
In the Pagedip oPanel, select the IAM tab at the top.
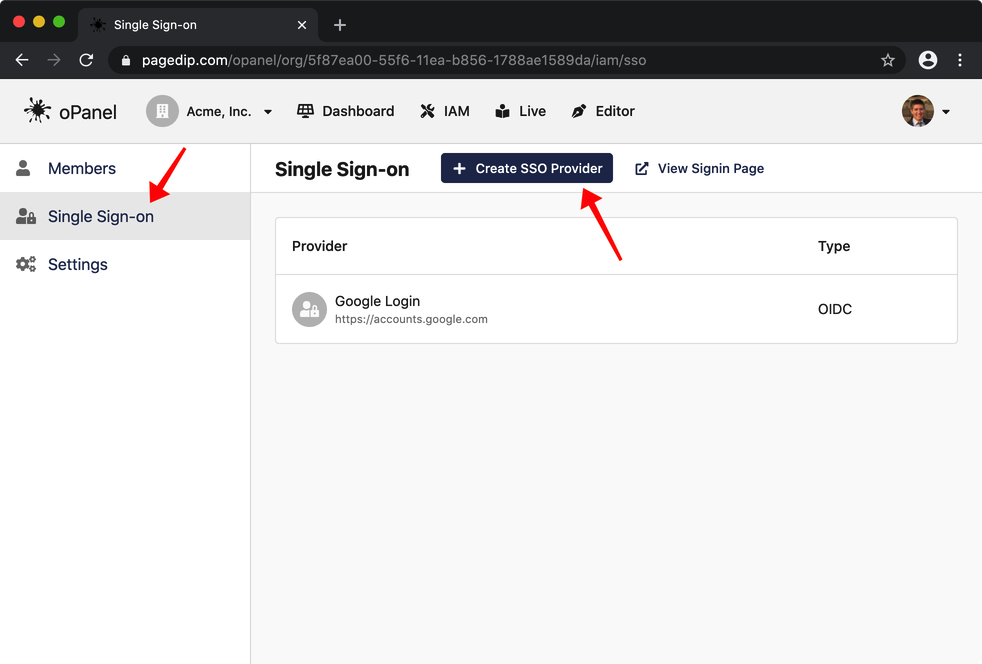
Next, select the "Single Sign-on" link in the left sidebar and then the button to "Create SSO Provider".
Note: Your organization must have the Single Sign-On feature enabled for this option to be present. Please contact us if you don't see this option, but would like to use this feature.
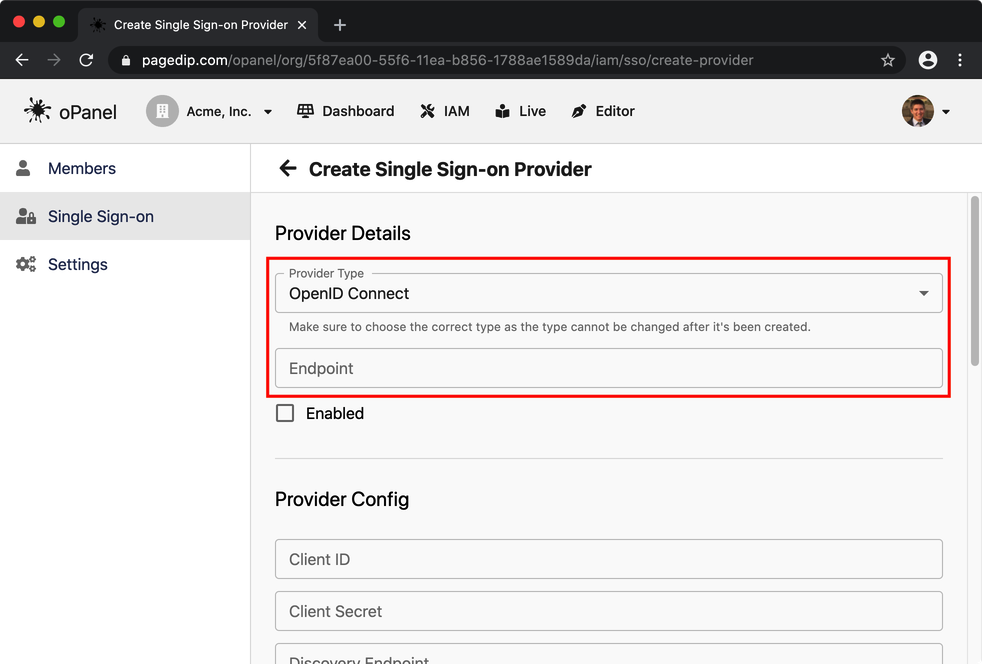
This next page will have a lot of options on it, however only the first section is required. Choose the type, which depends on what your platform supports, and add an endpoint. The endpoint is required, but can be any value, including a placeholder.
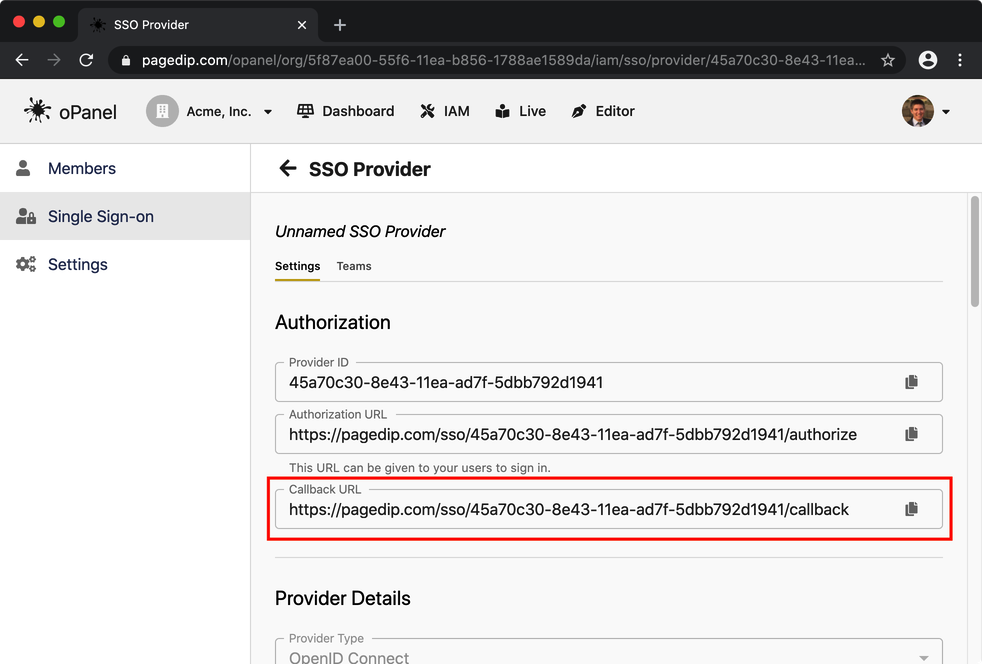
After creating the SSO provider, you'll be taken a page with details on it. Included is the callback URL which may be required to complete the integration on your identity platform.
From here you'll need to obtain the details on your identity platform and fill them out on this page. You can test out the integration by following the Authorization URL.